Reveal 1.5.1简单使用备忘
1,在当前用户目录下,打开终端中新建一个.lldbinit文件
vim ~/.lldbinit
command alias reveal_load_sim expr (void*)dlopen("/Applications/Reveal.app/Contents/SharedSupport/iOS-Libraries/libReveal.dylib", 0x2);

command alias reveal_load_dev expr (void*)dlopen([(NSString*)[(NSBundle*)[NSBundle mainBundle] pathForResource:@"libReveal" ofType:@"dylib"] cStringUsingEncoding:0x4], 0x2);

command alias reveal_start expr (void)[(NSNotificationCenter*)[NSNotificationCenter defaultCenter] postNotificationName:@"IBARevealRequestStart" object:nil];

command alias reveal_stop expr (void)[(NSNotificationCenter*)[NSNotificationCenter defaultCenter] postNotificationName:@"IBARevealRequestStop" object:nil];
2.连接到模拟器调试
在application:didFinishLaunchingWithOptions:方法中,进行以下几步,
- 加一个断点,并右击编辑
- 单击“Action”右边的“+”,输入“reveal_load_sim”
- 勾选上“Option” 上的选项 “Automatically continue after evaluating”,
连接到真机调试
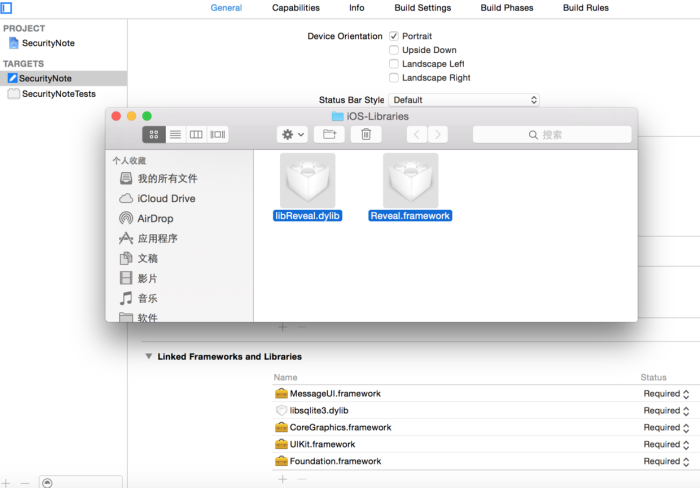
- 添加Reveal链接动态库到我们工程:在Reveal菜单“Help”->”Show Reveal Library in Finder” 找到动态库后拖拽到工程中;
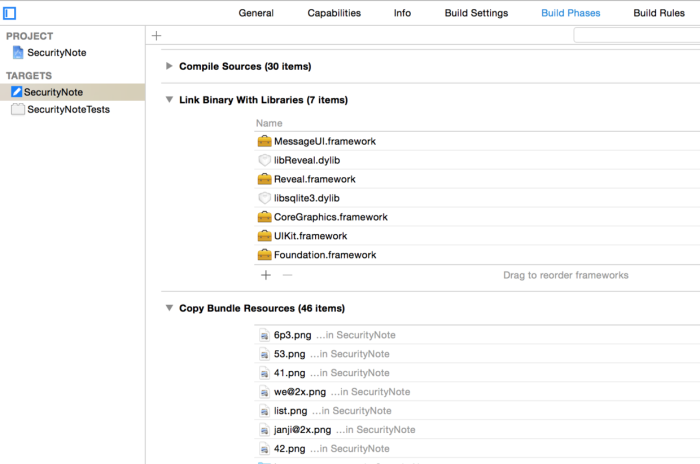
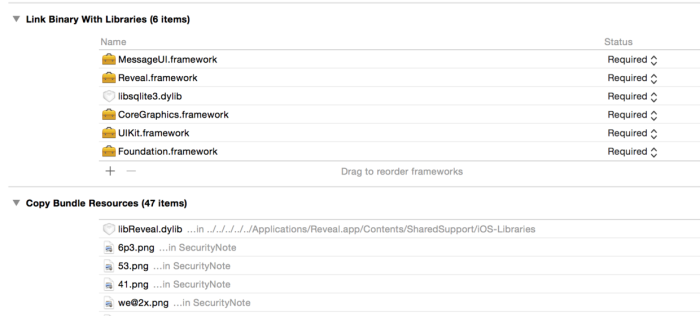
- 注意Xcode默认是将其设置到“Link Binary With Libraries”中,需要删除它,并添加到 “Copy Bundle Resources”下面;
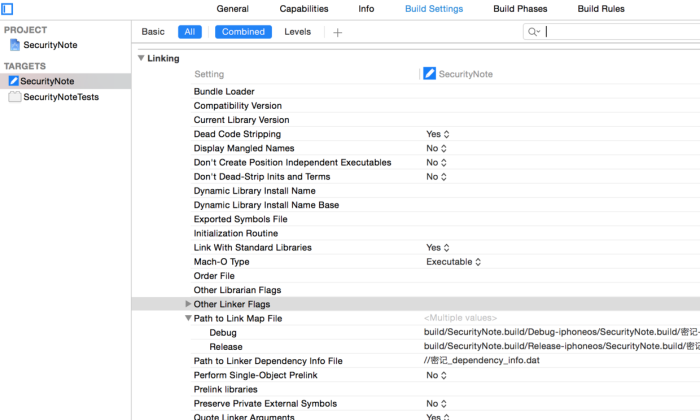
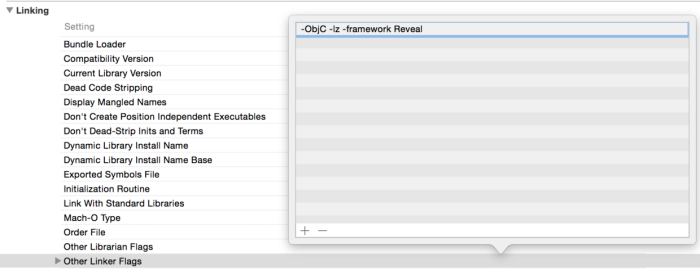
- 选中 Build Settings栏找到Linking下面的Other Linker Flags setting:
-ObjC -lz -framework Reveal
在项目代理中的application:didFinishLaunchingWithOptions:方法中,进行以下几步,
- 添加一个断点,并右击编辑
- 单击“Action”右边的“+”,输入“reveal_load_dev”
- 勾选上“Option” 上的选项 “Automatically continue after evaluating”,


